
Jungle Jim Devlogs
I am passionate about documenting what I have learned and writing about my experiences creating games!
Enemies and Bosses
July 7th, 2026
Design devlog about the enemies and bosses and my thoughts about their conception and implementations.
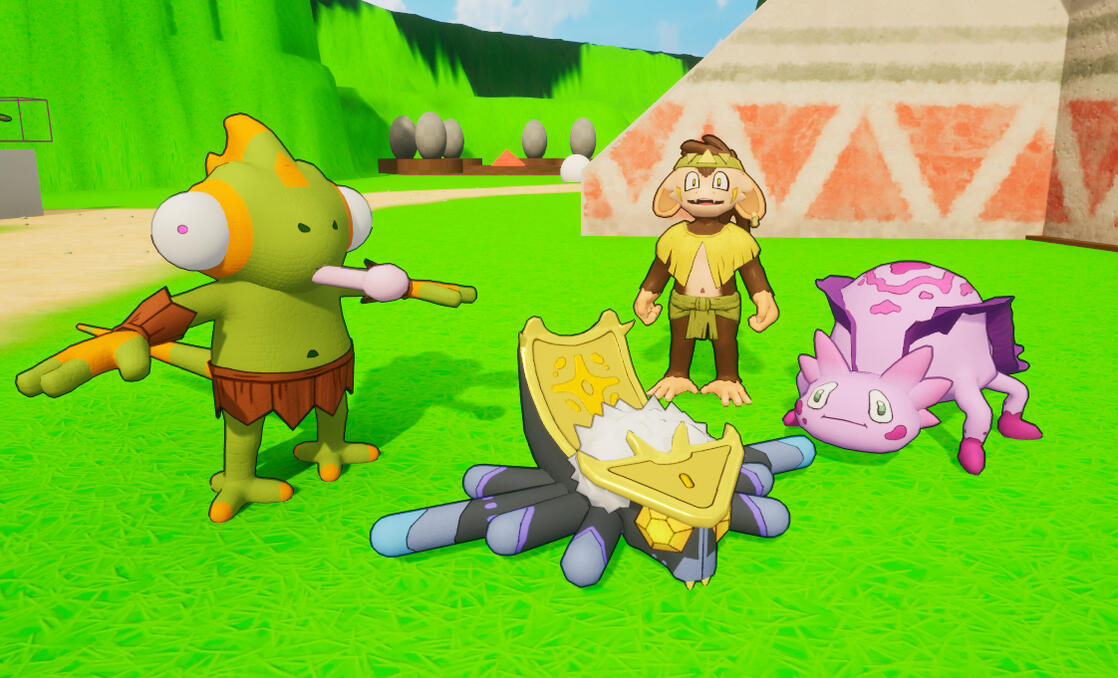
The Base Movement of Jim
March 6th, 2026
Design devlog about the my philosophies and decisions behind the base movement mechanics of Super Jungle Jim.
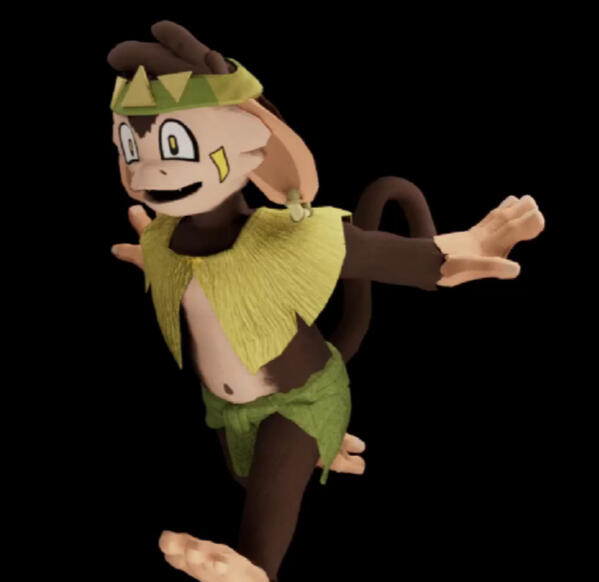
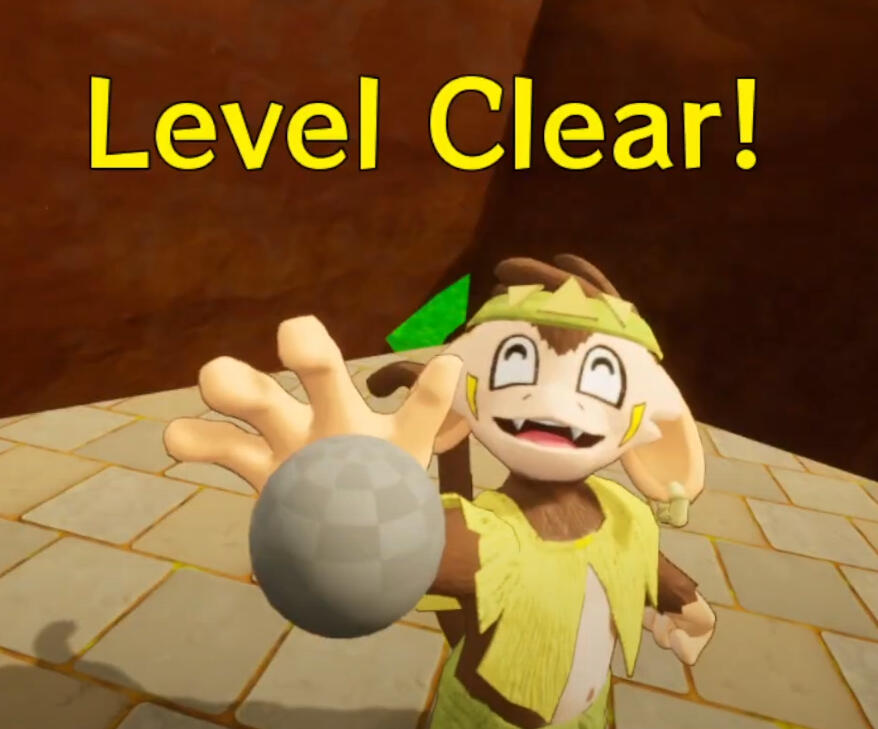
Creating End of Level Cinematic
January 6th, 2025
In-depth documentation about my process, thoughts, and lessons learned as I created this cinematic. In particular, my developmental planning process shines through here.
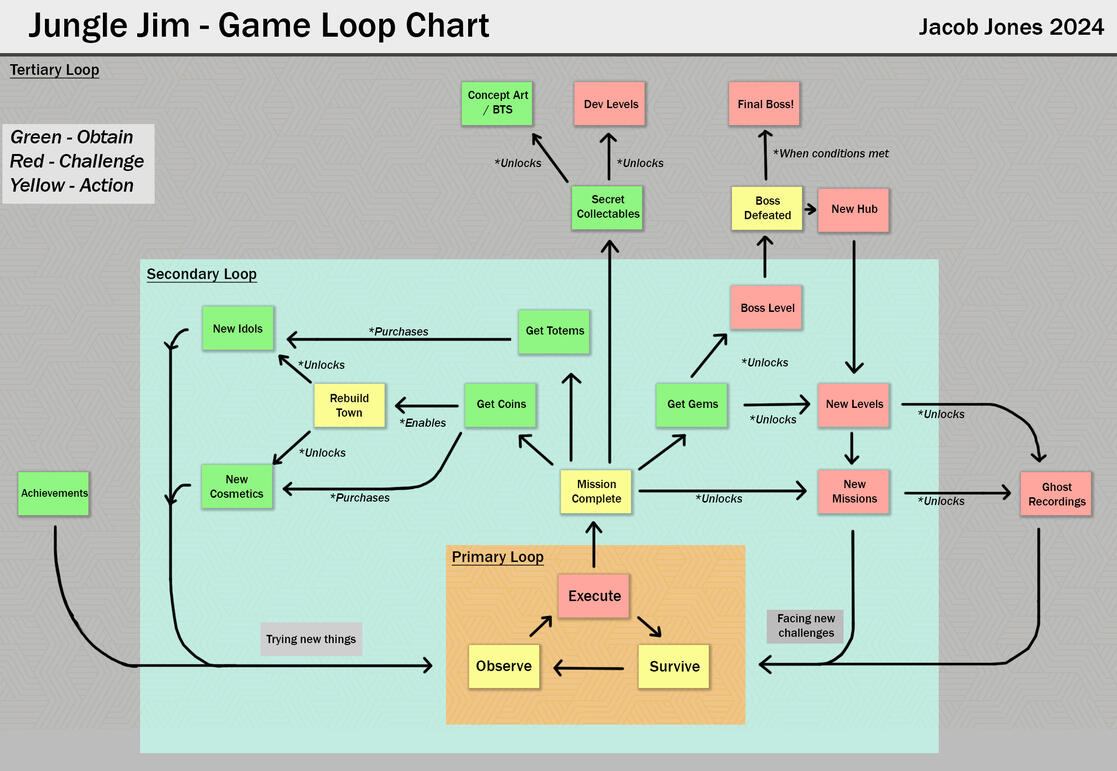
The Gameplay Loop of Jungle Jim
November 14th, 2024
Writing about the gameplay loop I've created for the game. I discuss theory for creating a strong core game loop and connect them to examples in Jungle Jim.
First Time Leading a Project
November 12th, 2024
Personal narrative of my experiences leading and managing a team for the first time. I discuss issues I encountered, as well as how I resolved them.
Teaching the Player Without Intrusion - Creating The Tutorial
September 11th, 2024
In-depth documentation about my process creating the tutorial area of the game. I aimed to create an unobtrusive experience that gave players a space to learn at their own discretion.
The Players' Lens - Designing the Camera System
October 13rd, 2024
In-depth documentation about the camera system created for the game. I discuss the numerous features, as well as the design decision behind their implementation.

Misc. Devlogs
I am passionate about documenting what I have learned and writing about my experiences creating games! I like to take a retrospective style- accumulating my experiences and writing about them in longer-form devlog posts.
Pizza Panic Post-Mortem: What a Second Iterative Loop Would Entail
May 2nd, 2024

Character, Controls, and Camera.
May 22nd, 2026
The heart of this game is about overcoming challenges through repetition and effort to achieve great things. This experience is reinforced in the game's character, controls, and camera.Similar to the games central experience, I had to overcome challenges through repetition and effort via iterating on these elements until they were just right for the game.
Magnetic Forces
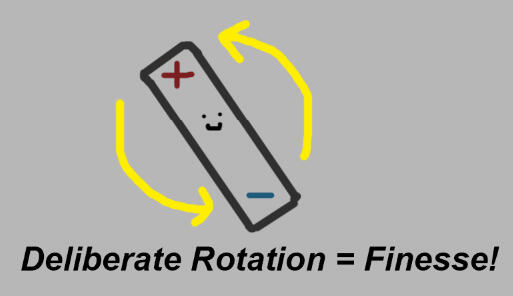
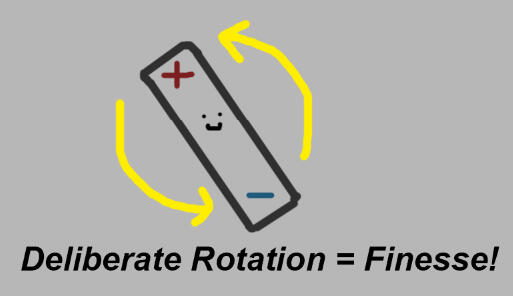
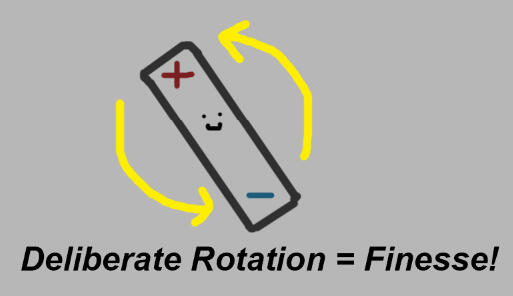
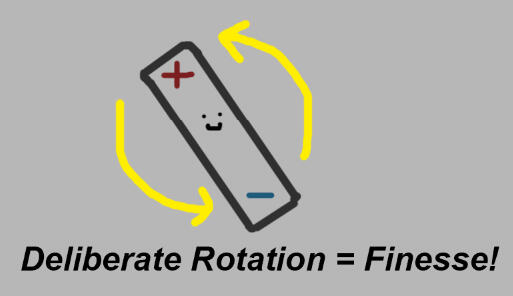
The core premise of the game was that the player controls a dipole magnet, rotating it around a central pivot to manipulate their velocity and traverse the level. The main desired experience of the game is to create a sense of "finesse" within the player. Deliberate rotations of the mouse cursor result in the character moving in different but consistent ways. This creates a unique sense of movement that the game needs to maintain as a baseline: rotation = movement.Because a significant portion of the movement is entirely driven by magnetic interaction, perfecting the system became an important part of the character controls.My first implementation was intentionally simple. It applied force along the direction between two magnets’ normal vectors, with the magnitude attenuated by distance. This was enough to validate the core concept, but the system lacked both simulation depth and gameplay intent.
Basic First Implementation
Once the first implementation proved viable, I looked into how magnetic forces behave in the real world. I looked into the Lorentz Force Formula, which describes how electric charges interact with magnetic fields. In reality, magnetic fields emerge from enormous numbers of moving electric charges, but fully simulating that behavior would have been unnecessarily expensive and overly complex for the needs of the game. Instead, I simplified each magnet into a single representative charge while preserving the physical relationships most relevant to gameplay.The most important takeaway from this research was the relationship between force and velocity. In real electromagnetic systems, faster-moving charges experience stronger interactions due to a faster rate of transfer. This concept translated naturally into the game, since players are constantly entering magnetic fields at different speeds and angles. Basically, more relative velocity produces more force.Using these principles as a reference, I rewrote the magnetic force calculations to more closely resemble real electromagnetic behavior. It was certainly more realistic...but that was a bit of a problem. At this point, the formula was not altered in any way to accomodate gameplay. We wanted the game to have a sense of finesse where players could master the controls over time. The reality is that physics is hard to predict and not always fun to control. Players struggled to control their left and right velocities and their movements would feel sluggish when trying to change directions. Other features were added to assist with player control, but I still wanted to adjust the formula to better accomodate gameplay.The final implementation focused on preserving the physical inspiration of the system while shaping it around player readability and responsiveness. I added padding and clamping to create consistency. This was especially important for the distance attenuation. A mathematically accurate inverse-square force created dramatic acceleration near magnet surfaces, which made platforming feel difficult to get a read on during fast gameplay sections. To improve horizontal control, I also incorporated a 2D cross product between the player magnet’s velocity and the target magnet’s normal vector. This allowed the force magnitude to scale based on how perpendicular the player’s movement was relative to the magnetic surface, giving players more deliberate control over lateral movement while inside a magnetic field. Not pictured, I also do an occlusion check between the two magnet surfaces. This occlusion check is between 0 and 1 and is multiplied with the final result.By the end of development, the system had evolved from a simple force simulation into a movement system that was better designed for predictability, responsiveness, and player mastery. Although the final implementation still draws heavily from real-world principles, it has been tweaked to provide a better gameplay experience.
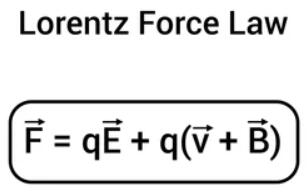
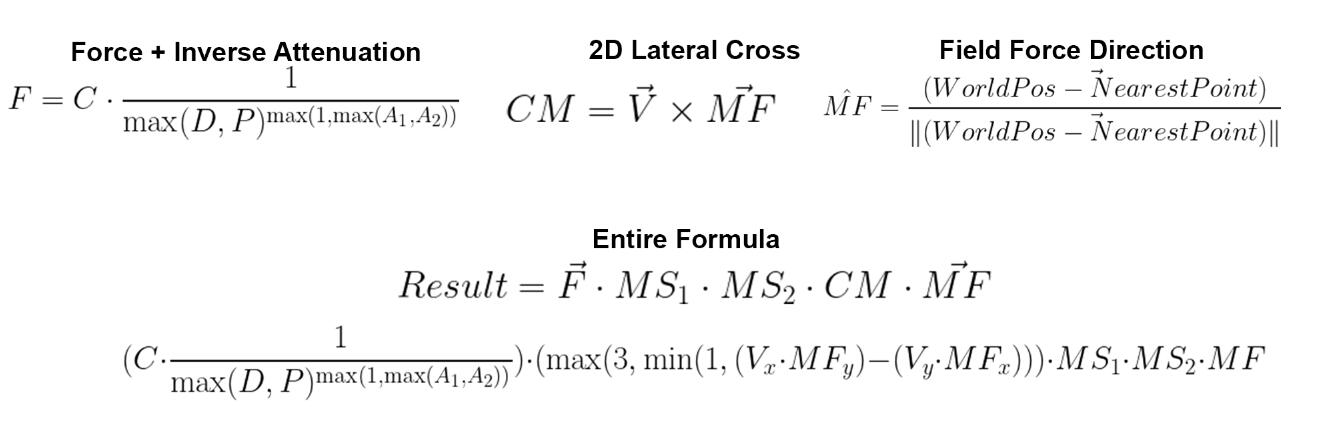
Final Magnetic Force Implementation
Non-Magnetic Movement
At the core of the game, the player traverses levels using magnetic forces. However, not every surface in the environment is magnetized, which raises an important design question: how should movement work on neutral surfaces?Movement in magnetic fields is heavily based on rotation, so I wanted neutral traversal to follow the same principle. Keeping both systems centered around the concept of rotational control helps create a more cohesive and consistent control scheme throughout the game.This led to concept of using physically based foddian mechanics for neutral surfaces.
Creating a system like this came with a slew of challenges based around physical logistics. Before any of that, I needed a baseline implementation to try out. I created a software cursor and made it so the players negative charge always pointed toward it.
Basic First Implementation
While this first implementation works well for moving the players character around, it was ultimately too naive. I realized that modifying the transform.rotation directly was a mistake, as it caused numerous physics bugs. If the player rotated too quickly while overlapping walls or floors, the physics system would calculate extremely large corrective velocities that created unruly behavior. In cases where this wasn't occurring, there was still a problem. Similar cursor motions could produce very different player velocities, making the controls feel unreliable.
Large Velocities Physics Issue
The solution I used for this problem was to replace the direct rotational changes with a physically based torque system. Instead of modifying transform.rotation to point towards the software cursor, I used custom torque forces on the rigidbody to point towards the software cursor. I also had to implement damping to the torque to prevent oscillation and overshooting.This method has an additional benefit of making the rotation feel significantly more tactile. Previously, players would rotate toward the cursor at the same lagging rate, even if colliders were in the way. With torque-driven rotation, colliders naturally resist movement when rotating. This creates a sense of weight to the player character and adds a sense of depth to the feedback of the controls.
Physically Based Rotation Implementation
Collision Querying
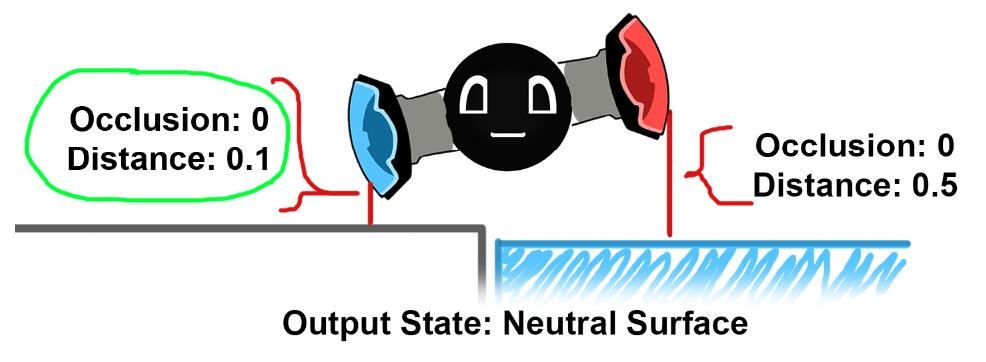
Throughout gameplay, the player is constantly changing between states that affect their controls. On neutral surfaces the player should be able to push themselves off of surfaces by rotating; however, on magnetic surfaces this behavior is not desired. The project has numerous collision queries to provide information for state changes and provide limitations that simplify the controls.In order to detect neutral surfaces, I first use a capsule collider to query for any overlapping surfaces flagged as neutral. Then, I do a raycast between the closest point along the neutral surface and the closest point along the player's collision. This is done to prevent conflicts when moving over the area where neutral surfaces transition into magnetic ones. Whichever end of the player is closest to either surface dictates which state the player is in.
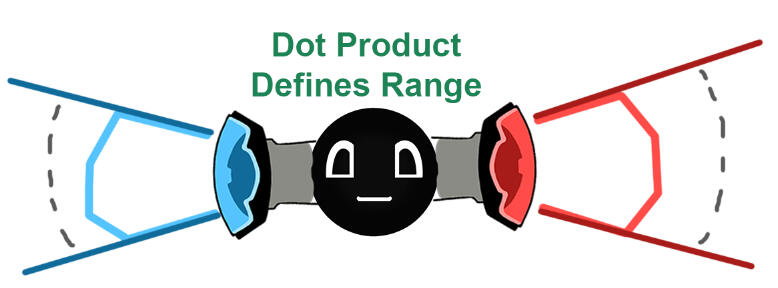
The player is a dipole, meaning both ends of the player has a different magnetic charge than the other. Early implementations ran into problems where players laying sideways or attempting to rotate in a magnetic field would see unpredicatable velocities. The reason for this, was that both magnets had a radius of effect that was unrestricted by direction. To create more predicatable movement and allow more intentional control, dead zones were put into place for each magnet's radius of effect. A dot product is checked before calculating any magnetic forces, and if it fails a certain threshold it is disregarded and skipped. Additionally, the dot product is used in affecting the force strength. This allows players to use the edges of their range of influence to get smaller boosts, as well as smoothing over the transition between net zero forces and repel magnetic forces.
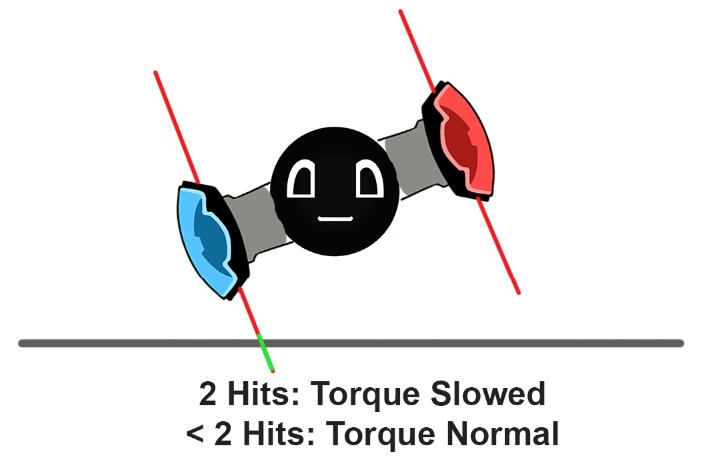
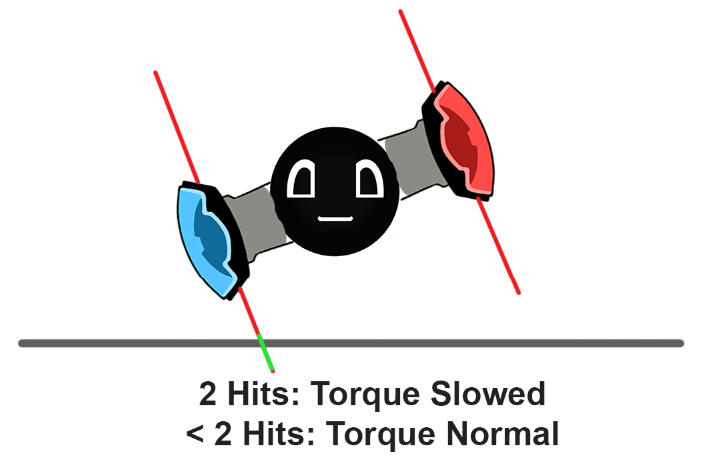
The neutral player state actually requires additional queries. One of the most difficult issues to solve with the movement was a logistical one. The player moves by rotating, as that is what pushes them against the ground. However, this comes with some problems.If players rotated extremely fast into the ground or walls, the physics system would output extremely large velocities. Slowing down the torque prevents this but also makes the player unable to move much at all. It also prevents the player from being able to react with quick rotations within magnetic fields. The solution involves dynamically changing the player's torque based on results from queries.My solution is simple, but has proved to be fairly effective. Raycasts are performed on the lateral vectors of a magnets direction. If both of these raycasts detect a surface, the players torque is slowed down. When only one or none of these raycasts return a hit, the torque interpolates back to its regular speed.
Movement Options
The base movement introduced so far is simple to grasp and hard to master. It is effective for the primary gameplay loop, but it does not provide enough variety to keep platforming feeling fresh on its own. I wanted to add additional aspects to the movement and distribute them as rewards for completing challenges. This way, the game has an additional sense of progression while providing new ways for players to think about levels moving forwards.
I prototyped 5 main concepts for additional movement for the player character.
Welding
Welding allows players to fuse to surfaces, preventing them from falling off or being pushed by magnetic forces. It primarily enables players to move laterally across magnet surfaces through an "inchworm" technique. There is a fair amount of frustration with trying to move laterally on magnets without flying far into the air, and welding resolves this issue by allowing player to move laterally without magnetism applying forces on them.With weld, players can climb up walls! This allows players to view levels in more dimensions which can open the door up for some mentally challenging platforming.
Launching
Launching allows players to exchange their battery power to leap great distances. This lets players have the decision to expend their resources in order to speed through challenges they may struggle with. It also opens the door to creating resource-management challenges within the level.
I was surprised by how many players enjoyed this mechanic. I think it appeals to a power fantasy of sorts for some players, but I have not quite put my finger on what exactly about it provides that. It may be as simple as the fact that the launching ability is very powerful in the context of the game.
Burst Projectiles
Burst Projectiles allow the player to have corrective control of their movements in the air by firing three subsequent shots that propel the character. This allows for smoother traversal through the levels, and makes the controls feel more fair by providing chances for players to correct their mistakes before they are punished. The projectiles are shot by exchanging battery power, so they must be planned accordingly within the players resource management.
Initially I planned to prototype a thrust instead, but then I thought of burst projectiles. The nature of the burst allow for a higher skill ceiling, as players can learn the timing to combine shots to get the exact result they wanted.
Bumpers - Cut
Bumpers allow players to jump with both of their ends expanding in a way that pushes the character upwards. This did not make it past the prototype phase, as it was too overpowered and detracted from the primary control scheme of the game revolving around rotations.
Initially, the bumpers were prototyped to mitigate an issue within the base movement preventing players from acheiving reasonable height with rotations. They were no longer needed after I fixed the issue in the base movement itself.
Grapple - Cut
Grapple allows for players to tether to nearby grapple points. At the moment of writing, this prototyped feature is not being considered to make it into the final game until it has more purpose and is reworked accordingly. I wanted to lean into the physics-based nature of the controls and provide new ways for players to traverse levels. Unfortunately, the grapple just is not adding anything interesting to the game. It is too slow in its current iteration, and is difficult to not make overpowered in the context of this game.
I would like to reinvestigate the grapple later on, but for now it will remain as a cool footnote.
Camera
The camera is the lens through which the player experiences the game. All game information is presented through its frustum, so it has a great deal of importance.The camera targets the player character, with a bit of lag and look ahead for a smoother look. To improve players' reaction times, the camera zooms out as the characters velocity increases. Volumes were also added to modify camera properties such as zoom or follow targets. These proved to be very useful for putting emphasis on certain elements in a level.We wanted to implement parallax to build depth in our scenes. Initially, I created a parallax script that worked with an orthographic camera. However, we also wanted our camera to be able to zoom in and out. Orthographic cameras do not have a sense of scale to their projection, which made it very difficult to implement parallax through a script when the camera zooms in and out. Because of this, I switched gears and switched our camera setup to use a perspective camera instead.I used Cinemachine to constrain the camera within bounds defined by a collider. Cinemachine is unable to do this smoothly with a perspective camera, so I had to create a dummy orthographic camera to use for the constraint.We also wanted to be able to blend between different follow targets for dynamic cutscenes. I created some utility functions that allowed us to easily add and remove follow targets with weight interpolation.
Signed Distance Field Generation
May 28th, 2026
One of the most ambitious tasks of this project was the creation of a signed distance field generator for use in the render pipeline. The task relied on compute shaders, custom render passes, and dynamic mesh generation.
Purpose
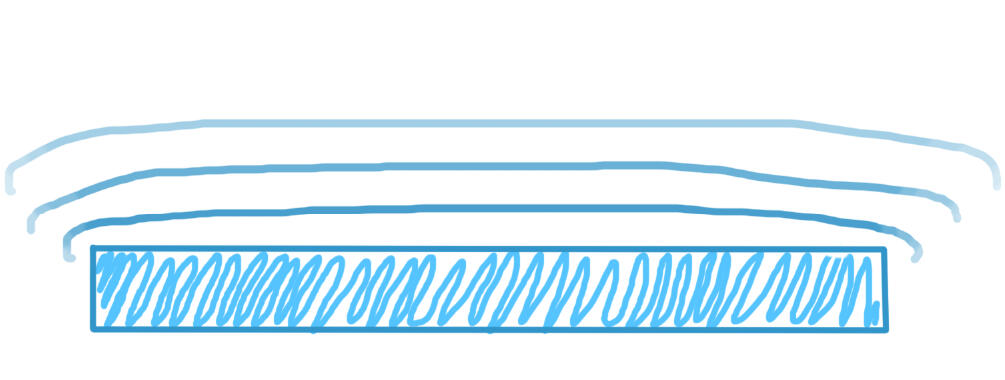
Before I start getting technical, why was this needed in the first place? Well, this game benefits heavily from players being able to read at a glance any magnetic field's range, strength, and attenuation. I wanted to do anything I could to make the game feel fair, and a huge part of that was giving the player the necessary information to make quick decisions. I had the idea to use emanating lines to communicate this to the player. Their speed, size, and color could be used to show all aspects of the magnetic field that a player would need to know. A huge source of inspiration for the look of the effect was this visualization video for bats echolocation.Without any visual indicators for this information, players would be unsure of a magnets strength or range until they were already being affected by it. This turns the primary action of the game into a situation of trial and error, which should be avoided for something the player will be doing from moment-to-moment.
Planning the Tech
I knew that with signed distance fields, I could create a shader that imitates the look from the echolocation video. What I didn't know however, was that Unity does not have any built-in signed distance field support. This means I would need to create it myself. The implementation I wanted for this game was a render texture that could be sampled globally by any shader. In order to avoid the cost of having yet another camera added to the scene, I opted for the most efficient route- creating the render texture during a custom render pass injection. The render texture is written to every frame in the rendering process, and a multi-threaded compute shader is used to calculate the signed distance field operations.
Additionally, I needed a way to display these shaders in the game world. Each magnet has its own properties such as strength, attenuation, and range that should be displayed. This means each field needs to sample the SDF in its own shader, with its own properties inserted as parameters. Magnetic fields operate in gameplay logic using procedural colliders, but there are no meshes or sprite renderers associated with them. I needed a way to generate a sprite or mesh based on the shape of a collider, while also respecting occlusion of game elements. I ended up creating a procedural mesh generator based on the vertices from the collider, and used this mesh to display each magnetic fields shader.
Compute Shader
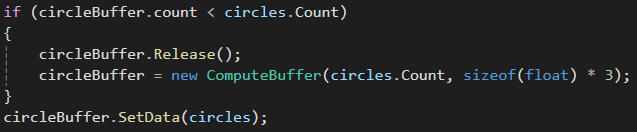
Calculating signed distance fields for every magnetic field on every single frame is expensive. In my first implementation used to test the concept, the game crawled to 5 fps. This first implementation ran on a single CPU core because it used Unity math functions, which are not thread-safe. I liked the look of the test, so I moved forwards with offsetting the work onto the GPU.I created a compute shader to calculate the signed distance fields. and write them onto a render texture. In order to make this work, I had to first provide the compute shader with the necessary data, then write my own signed distance field functions for each Unity collider type. Thankfully, there are plentiful resources online about writing signed distance field formulas for many shape types.
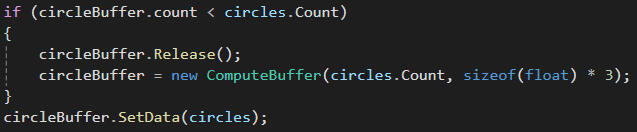
First, I create Lists of custom structs to hold the data that the shader will need.

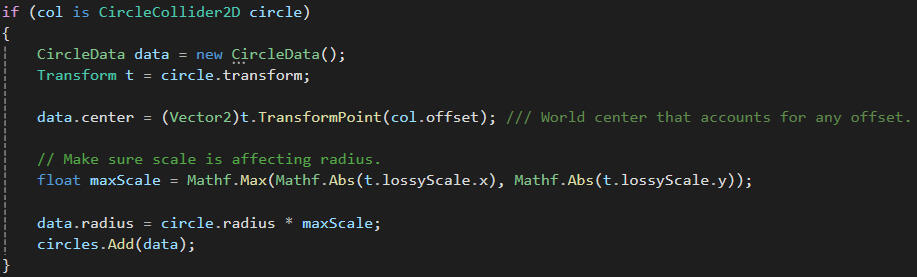
These lists get filled with their data in C#, since I need access to their colliders to derive necessary data.
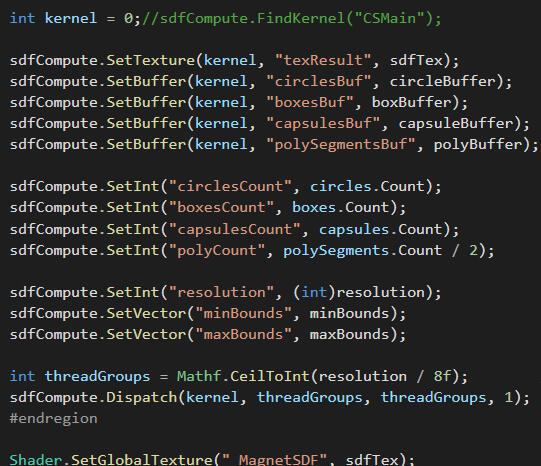
The C# script then sets up the buffers with the data and then dispatches the compute shader. The compute shader will handle the larger quantity of calculations.
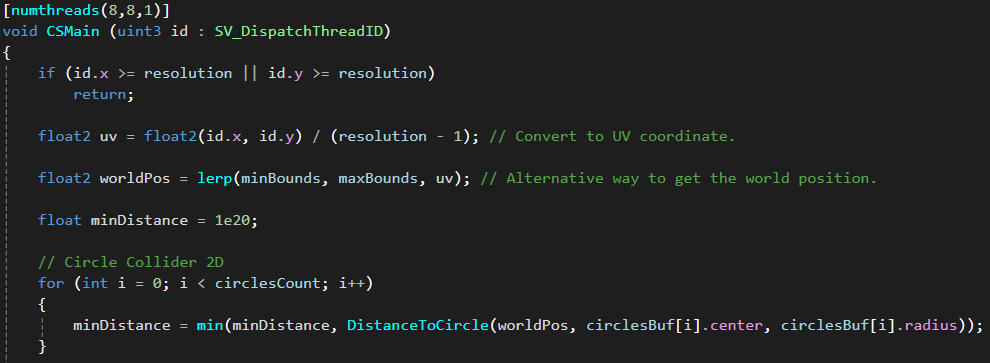
The compute shader is actually quite simple! For every pixel in the texture, the world space of the pixel is used to get the minimum distance from any magnetic field collider. This minimum value is written into the render textures pixel, effectively creating a grayscale image.The "DistanceToCircle" function is a function I wrote for the shader. I had to write one for each collider type to return the correct distance while accounting for scale and rotation. This is why I needed those buffers populated with particular data.
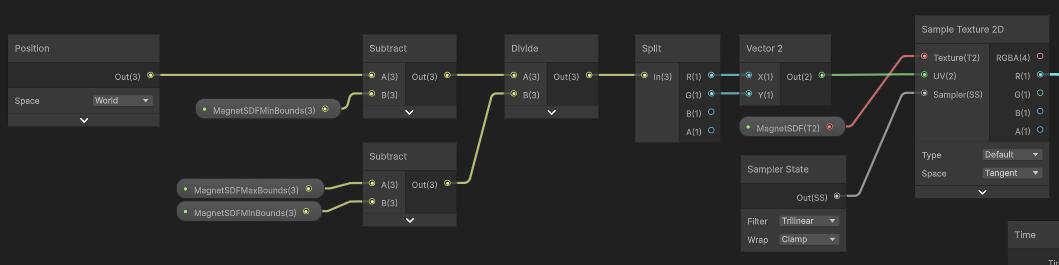
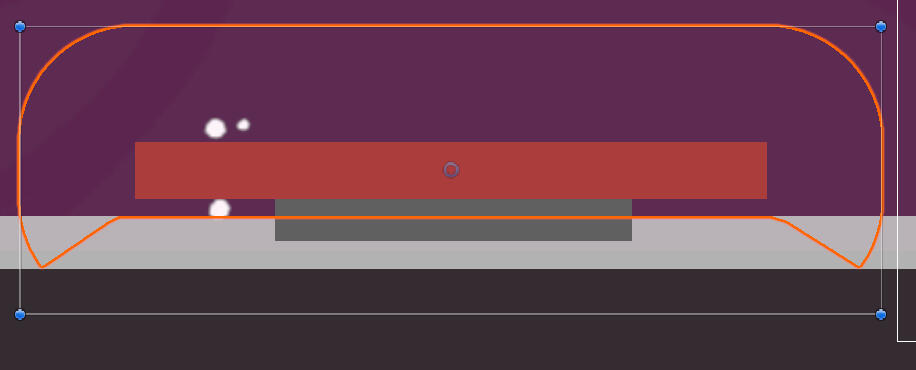
I used shader graph to sample the signed distance fields for use on the magnetic fields' meshes. Notice how it samples while using a set boundary- this is actually a clever trick that works specifically for this game.Since this game is 2D and has small rooms for the levels, I was able to do a huge optimization for this effect. I use a box collider to define the bounds for which signed distance fields should be generated, and set a desired resolution for the render texture. Usually, 256 x 256 is plenty resolution for the average room size.
Custom Render Pass Injection
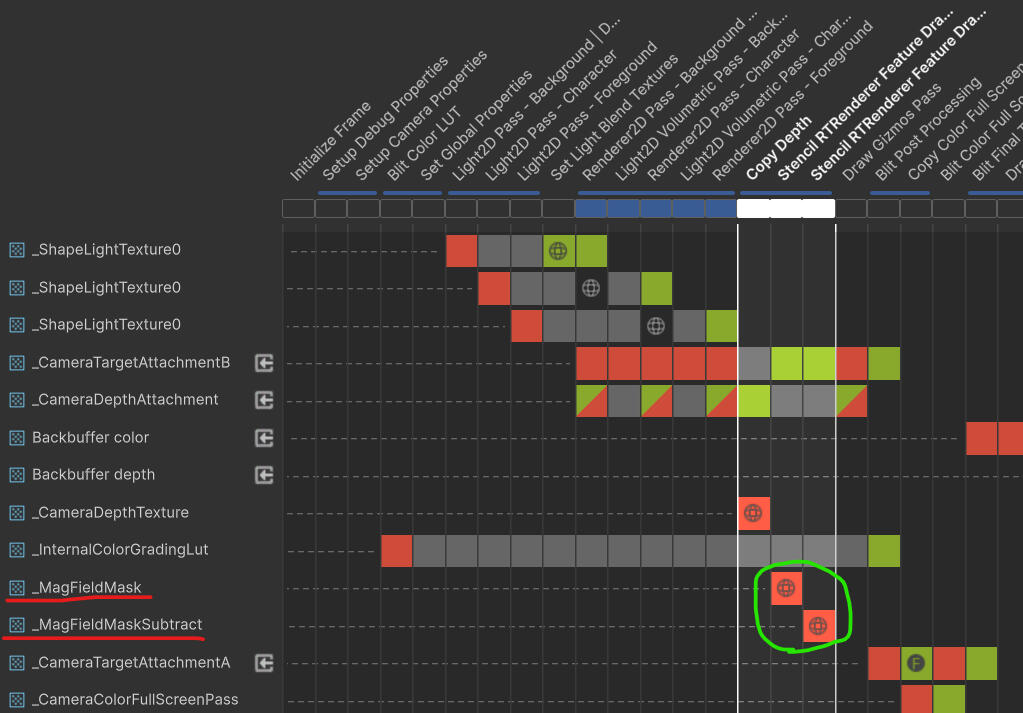
I also wanted to add some extra juice to the effect. I wanted to distort the background behind magnetic fields, similar to how refraction distorts around heat. In order to do this, I needed a mask that is white only where magnetic fields are visible and not occluded by foreground elements. A fullscreen shader uses this mask to apply the distortion only on the white pixels.
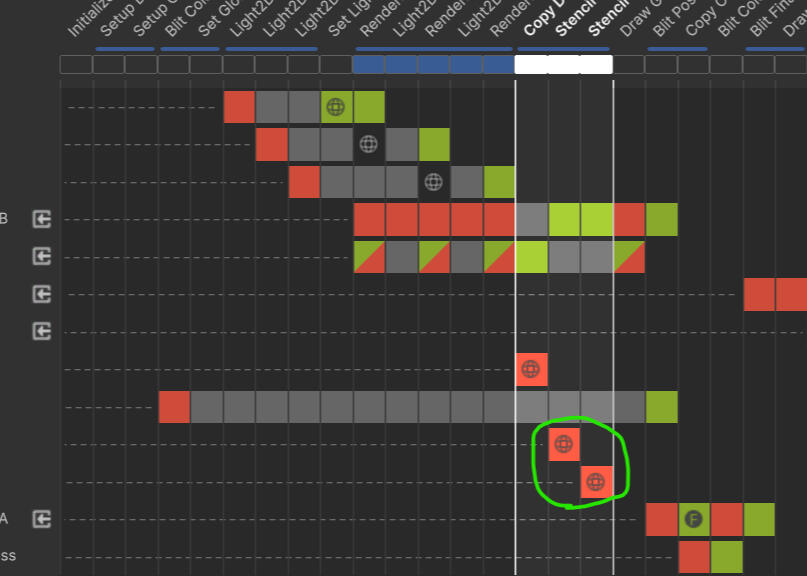
The most optimized way to create this mask was to use a custom render pass and to inject that into the render pipeline using Unity 6 Render Graph.Since Render Graph is still new, there is not sufficient documentation on how to do this. It took a lot of diving into source code and experimentation, but I eventually was able to do it. I generate a mask that is white where fields are, and also a mask that is white where foreground elements are. By comparing the masks, I can get the mask I needed.The masks are created by assigning a pure white material to the targeted layermask, and only rendering that layer using the Render Graph API.The code is very extensive and complex, so I wont have images of it here. Check out the GitHub repo to check it out at Settings/CustomRendering/StencilRTRendererFeature !
Magnetic Field Procedural Mesh Generation
The magnets in our game are very dynamic in their shapes and in their velocities. Because of this, it was much quicker to procedurally generate their shapes based on their collisions instead of creating custom sprites for every magnetic field that matches their collision.Thankfully, a Unity employee created a Collider2D.CreateMesh function that greatly assisted in this. It successfully generates a mesh based on the collider shape. However, this function alone is not sufficient for our needs. Depending on the hierarchy of objects, the generated mesh would have incorrect offsets, scale, and rotation. Additionally, they would not account for solid objects occluding the magnetic fields.For each point on the collider, I perform a series of line traces to determine where the proper location for that point should be in respect to surrounding occluders. One aspect that was a tad tricky was figuring out what to do with points that were generated INSIDE of an occluder. I determined that it was okay to leave those alone, and to just make sure they are obscured behind the occluder in terms of Z order.Getting the offset, scale, and rotation to be correct was a tricky bit of matrice transformations between object and world space. What was causing issues was the parents of the mesh having varying positions, rotation, and scale in their local transforms. I needed to successfully apply the transforms of each object in the hierarchy to create the correct orientation and size of the generated mesh.
Game Concepts
May 31st, 2026
The process behind developing the game's concept and design. In this devlog, I dive into project constraints and market analysis and how those informed the design of the game. Over many iterations and much research, the game grows into its own.
Design Constraints
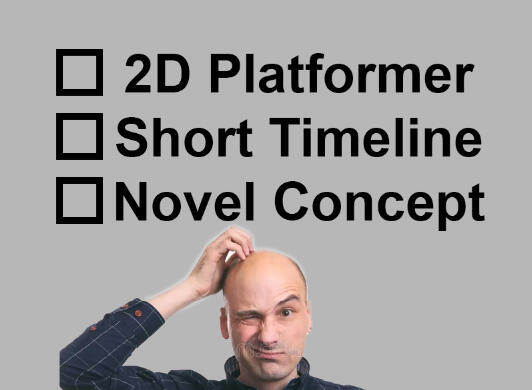
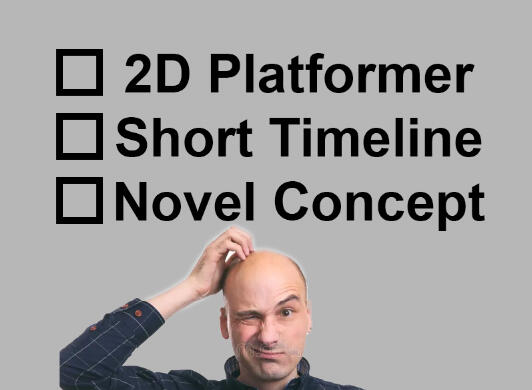
The project began with several key constraints. The game had to be a 2D Platformer and it had to be developed within a short production timeline. Because 2D platformers are a notoriously competitive market with limited visibility, I knew this game needed to have a strong novelty factor to stand out in the market.To explore our potential directions, I drafted and presented several concepts to the team:
A character that throws and retrieves a spear while being tethered to it by a rope, allowing for swinging motions from the spear when planted into surfaces.
A character that is a sentient paint blob that can squirt and hop between paint, growing and shrinking based on absorbed volume.
A character is a dipole magnet that uses attract and repel forces through magnetism to traverse obstacles.
Out of these options, we ultimately went with the magnetism concept. When researching existing titles, I found a few games already exploring variations of the spear and blob concepts. However, I found no titles playing with magnetism as a primary platforming concept.With a general concept picked out, it was time to investigate the idea further and see what kind of experiences could be derived from it.
Desired Experience and Game References
After consideration, I became interested in making a game all about “finesse”, all about carefully adjusting values to achieve an outcome.Classic lunar lander games served as an early inspiration because they challenge players to make subtle adjustments to thrust and positioning. However, it is a very slow-paced experience, but this project would be an action platformer.The values being adjusted in this case would be the orientation of the player character. This brought to mind Kuru Kuru Kururin. This game simplifies that concept to a large degree, making it accessible for all audiences as a puzzle game. I wanted to consider a more puzzle-based experience as an alternative route to potentially explore.First, I wanted to dive into the action concept. Rotating the mouse cursor rotates the player character, which orients the magnets differently. Players would be required to exersize continuous precision through fine motor-controls. I didn't realize this until later on, but this concept is very similar to Trials.
Lunar Lander (1979)
Kuru Kuru Kururin (1979)
Trials 2 (2008)
Benette Foddy
The concept certainly sounds unique, but it raised some serious concerns with difficulty and accessibility. Naturally, this led me to examine the Foddian genre.Foddian games are built around movement systems that are initially awkward or difficult to control but can become rewarding through mastery over time. The appeal comes from the satisfaction of overcoming difficult challenges. They’ve grown quite popular with streamers over the past two decades due to their strong novelty factor as an emotional catalyst for content.The most notable Foddian game to mention is Getting Over It, which popularized the genre. Getting Over It has generated 33M in revenue since releasing in 2017.
Getting Over It (2017)
Beyond The Market - Creating Art
The game concept so far seems to check all the boxes. It is a 2D platformer with a strong case for novel appeal. It was also something I could see myself being able to finish within a year. However, I was not satisfied. As a creator, I wanted to create more than just a soulless cashgrab. I wanted this game to be remembered as more than just a challenging platformer.To evaluate the concept, I documented design goals and potential risks. The most significant concern was player motivation. Many Foddian games rely almost entirely on intrinsic motivation. I wanted the game to appeal to broader audiences as well.The game needed stronger extrinsic motivation. This realization led us down the path of creating a stronger narrative focus.
Narrative
Foddian games do not tend to have stories, and the ones that do are more of a footnote. But for us, narrative became a tool for rewarding player progress and maintaining curiosity. If the game world has a sense of wonder, it may capture the imagination of players and push them forwards on their journey.We decided to make the game's narrative theme being all about hope, life, and overcoming difficulty.
The goal was to use the narrative to motivate the player through progression, storytelling, and offering thematic cohesion with the games core experience.
Game Art
Another core concern was marketability. The gameplay is not an immediate hook in the context of a store page. The game would require a strong visual identity to win over the attention of the market and potential fundraisers.To address this, our artist developed a hand drawn style with macro scaled environments. The game's visual presentation revolved around building an atmosphere through parallax backgrounds, depth of field, and environmental visual effects such as particles. This communicates the games tone and adds to the immediate visual appeal to the game.Additionally, it adds another layer of enjoyability to the game. With programmer art, the games rapid-room like structure can feel a bit like a flash game. Implementing this art style adds depth to the experience by making the scenarios feel much more serious and providing a world for the narrative to live through.
Accessibility Through Structure
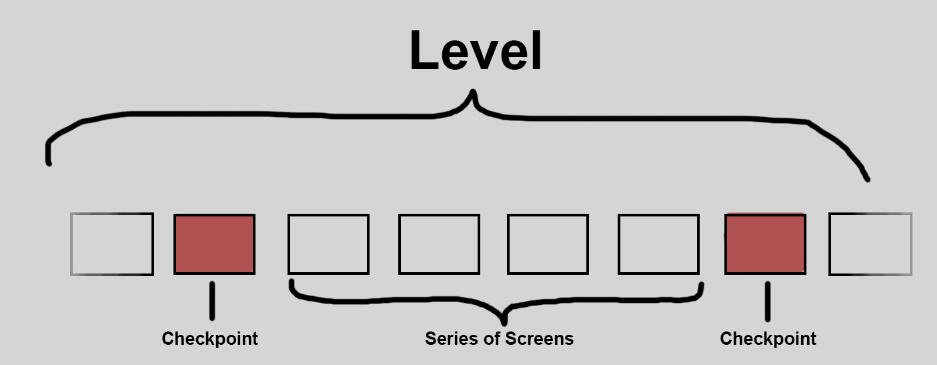
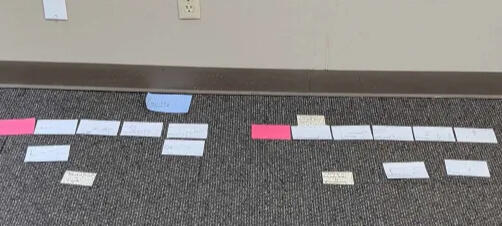
Foddian games commonly punish mistakes by removing a significant chunk of a player's progress. It's true that this creates tension, but it is too demanding for players that are not interested in extreme punishments.I still wanted to appeal more broadly, so I drew inspiration from Celeste to create our level structure.Challenges are designed around individual screens, which each screen having a self-contained "gameplay story". Levels are made up of these screens and organized into small chunks divided by checkpoints. Each level is built around a narrative theme and a new mechanic.This format made it very easy to use index cards to experiement with different layouts for our screen stories!Players have a set number of lives, and are punished when they run out. Punishment in this format is less severe-only sending players back to the last checkpoint instead of potentially to the very beginning.This format also allows easy logistics for accessibility modes. It is trivial to switch to an "easy mode" that allows players to respawn at their current screen, instead of back at the checkpoint. The mechanics remain unchanged, but the game can now allow flexibility based on the player's motivations.It is important to not be too constrained by the rules of a particular genre that acts as our starting references. Mixing and matching elements from multiple genres can create better experiences with the correct decisions. With our decisions, the game has become more of a 2D Physics Action Adventure Platformer rather than a Foddianlike.
Conclusion
By this point, the core concepts for the game had been mostly figured out. I knew exactly what experience the game should provide, and I had gained insight on the priorities important to resonate with our target audiences. From this point forwards, it was all about prototyping and iterating on ideas to create the game.

Jacob Jones
Game Designer
You can message me through my email using the form below. Or if you rather, you can directly email me at my address.